Apologies


I know I’ve been quiet for waaaaaay too long but I have got a good excuse, I promise! Luckily I have commenced a few other projects that actually caught me by surprise so I had to drop my favorite old apartment project and let it rest while I am dealing with the urgent projects. More infor and photos are coming soon as well as my armchair finished : )))  I am the happiest to announce that my brand has just took off with a modest Facebook page but quite some good projects done under its belt. Have a look, like, share and enjoy!

https://www.facebook.com/ArtimpactByNikaDesign


Armchair III: Legs


The legs of our well-know friend are now ready. Have a look below.

 I spray-painted it with a copper bronze acrylic spray. Very even and beautiful color for furniture.DSC_1002         DSC_1004

DSC_1006

P.S. Still unsure whether I should varnish it or not. Guess we’ll see in the next post (:


A quick Saturday morning decoupage


I’ve had these candle holders from a local store. They never looked good to me and I actually bought them with the intention to decoupage them at some point. And the time has come. Below is the story in photos. It is a quick one indeed (:

DSC_0954

DSC_0957

DSC_0959    DSC_0962

Cut off the excess at the edges.

DSC_0963

And ta- dah!

DSC_0965


Fabric time

 Happy Sunday peeps!

Here is my part II out of V from the re-uphostering an armchair project.

 I have used a piece of ‘Paris’ fabric I’ve had left from the small couch pillow cases. Just stapled it on the sides of the back without worrying too much about how percise I am because the ends of the fabric will have another layer on top of them. The second photo shows how I stapled it at the bottom as it might be tricky with different chairs.DSC_0927DSC_0932


I then added the piece for the other side of the back and secured it with pins by also folding about 2cm where the new fabric overlays the already attached one.

DSC_0935

Next step was to staple it, starting from the top. Afterwards I moved to the side of the chair, pulling the fabric towards the side and stapling it without worrying too much how it looks as this bit will be covered with another layer of the same fabric. Be careful at the bottom though, because this one will be visible at the end.

DSC_0940           DSC_0941


Moving on to the front of the chair. I’ve had a whole piece of garment that perfectly fits the chair size with only just a little bit of excess.

DSC_0942

I thought I’d start with the top and secured it well with pins by folding about 2 cm at the edge of the top rectangle and then stapled it carefully because this one will be visible at the end.

DSC_0943

Then completed the top by pulling the fabric towards the right side rectangle first, folded it neetly and then secured with pins. Did the same with the other side and once I’ve made sure everything looks good and neat just stapled it carefully as it will be all visible at the end.

DSC_0945


Then pulled well the seat fabric towards the sides and stapled it well, no worries here though because the wooden parts will be on top of it.

DSC_0946  DSC_0947

Then I’ve pulled it towards the front and folded all the excess (about 3-4 cm). Stapled it at the very end even though it won’t be easy to see it as it is at the bottom of the seat. Below is the final (for now) look:

DSC_0949


Armchair-reborn

Remember that armchair from the ‘new’ toys I posted a day ago? Well it’s new life just began! I have reuphostered it and am going to share  the whole process in photos below. Take a look and enjoy : )


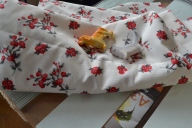
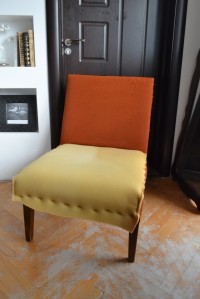
Here’s the look after we picked it up from my friend’s house and dismantled  it partially:DSC_0904

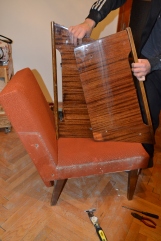
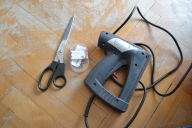
I have cleaned it up thoroughly with a vacuum cleaner and a damp cloth with some fabric shampoo. The tools I’ve used for this transformation are these below (staple gun, scissors and pins), fabric, a small hammer as well as a large foam piece,  my friend had from her DIY couch which she sold in pieces but saved the foam for my projects.

DSC_0911 DSC_0913


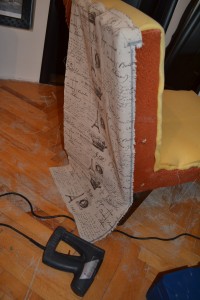
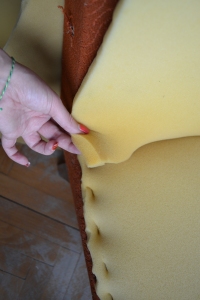
Moving on to the layering. I’ve cut two pieces of foam, matching the sizes of the seat and the back of the chair. Then started stapling from the middle of each side of the seat, so I could secure the foam in place and just staple it all over. Make sure you leave about 2-3 cm in the further end to be able to tuck it in between the seat and the back of the chair.

DSC_0909        DSC_0914

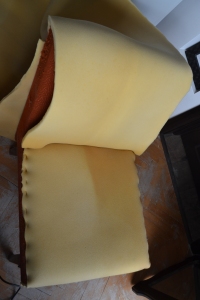
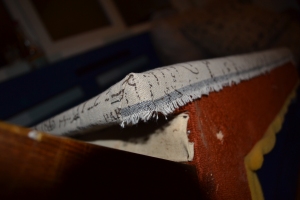
Once you have stapled everything at the very end of the edges of the chair, cut the excess away. It is visible how I have done that on the second photo above. I have allowed a bit too much lenght for the back because I wanted the foam to cover the top rectangle of the back as well. And let me remind you again to leave an advance at the bottom of the back piece as well for tucking in.

DSC_0918       DSC_0916


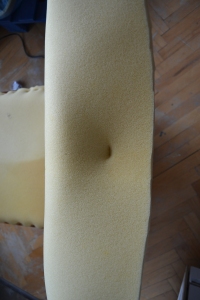
I have stapled carefully the back piece, left and right side and left the top middle open. Then pulled the foam towards the top (we don’t want any excess as when finished I assume there might be too much ‘air’ between the layers of the chair and this would definitely be sensible when you sit)  and stapled it with a single staple in the middle on the further edge of the top rectangle. I am showing it below and also a detailed look of the stapled foam.

DSC_0921       DSC_0919

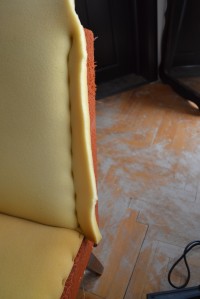
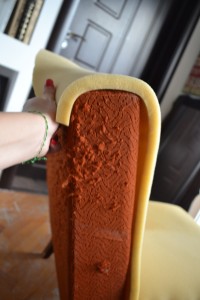
I am famous within my friends circle with my significant lack of patience. And this is obvious when I work at home too. Instead of planning it ahead I wanted to start the chair makeover straight away and did not test how many layers of foam would actually look good and feel extra comfy. So after attaching the first layer on the seat I’ve decided it needs another one. And simply stapled it above the first one, hoping that the foam won’t rip off because of the bigger pressure due to its size, which was the same as the first layer so there was no allowance for the second one to simply cover the first and just get stapled a bit further out from the first layer. However it did work out somewhat well. Have a look and I am moving on to fabrics in the next post.

DSC_0924

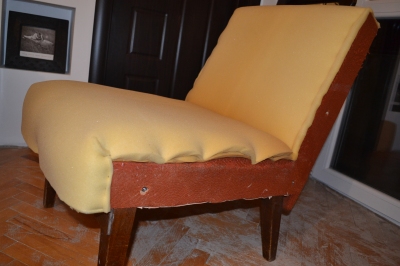
P.S With the bottom front I did the same as with the top rectangle. A staple in the middle and then moving to the outer sides of the front.


Growing Avocado at home


I am a serious avocado lover and besides that I have got bad knees and need to eat a lot of avocados due to its great qualities.

I can not tell you exactly what about the avocado makes it so great for my condition but from what I can remember when I was of medications for months, the pills contained avocado as well. And here comes the need to eat avocato quite often but it is an exotic fruit so here in my homeland it costs a fortune if you should buy it on daily basis like I do.

I heard you can grow one at home pretty easily. Here is my attempt to do so:

IMG_20141120_142410


Apparently avocado loves warmth and light. Once you take the seed out from a ripe avocado, wash it, stick 3 tootchpicks at the top half of the seed and just put it to rest in a plastic cup. Pour some water in it just to cover an inch of the bottom of the pit and there you are!

I’m attaching two videos I found most hepful on YouTube. Have a look:


IMG_20141120_142214

Here’s my little plantation that is actually rising in numbers almost daily!

New toys

Hello again people! I know I’ve been quiet for waaaay too long and I am probably about to loose you as bloggin’ pals so here’s an update with my brand “new” toys. Old chicks I found in a friend’s house. She’s changing places so was willing to chuck everything away or ideally sell it for ridiculously small prices. So my beauties-to-be cost me less than 20 $ altogether.


IMG_20141119_210840     DSC_0902

DSC_0895


So I’ve started upholstering the armchair and oh she’s about to become a thing of beauty!

Stay tuned. Next post is coming sooner than you might expect (:

They are heeeereee!

The new windows arw finally where they belong and the room is covered with a ‘primer’.  Soon, very very soon my job will start all over! Stay tuned for some home made chalk paint and cheeky wardrobe ideas. 
P. S Thanks for the patience peeps, more awesome content is yet to come :)))

image

image

image

Lounge area quiz

I am preparing a little something to keep the work flow going. The photos below are a hint. If you have any suggestions what it’s going to be, write them in a comment. I’d be very glad to read any ideas and/or advises. (: 


DSC_0367

IMG_20141023_163745